Saturday, 13 March 2021
The Web Serial API
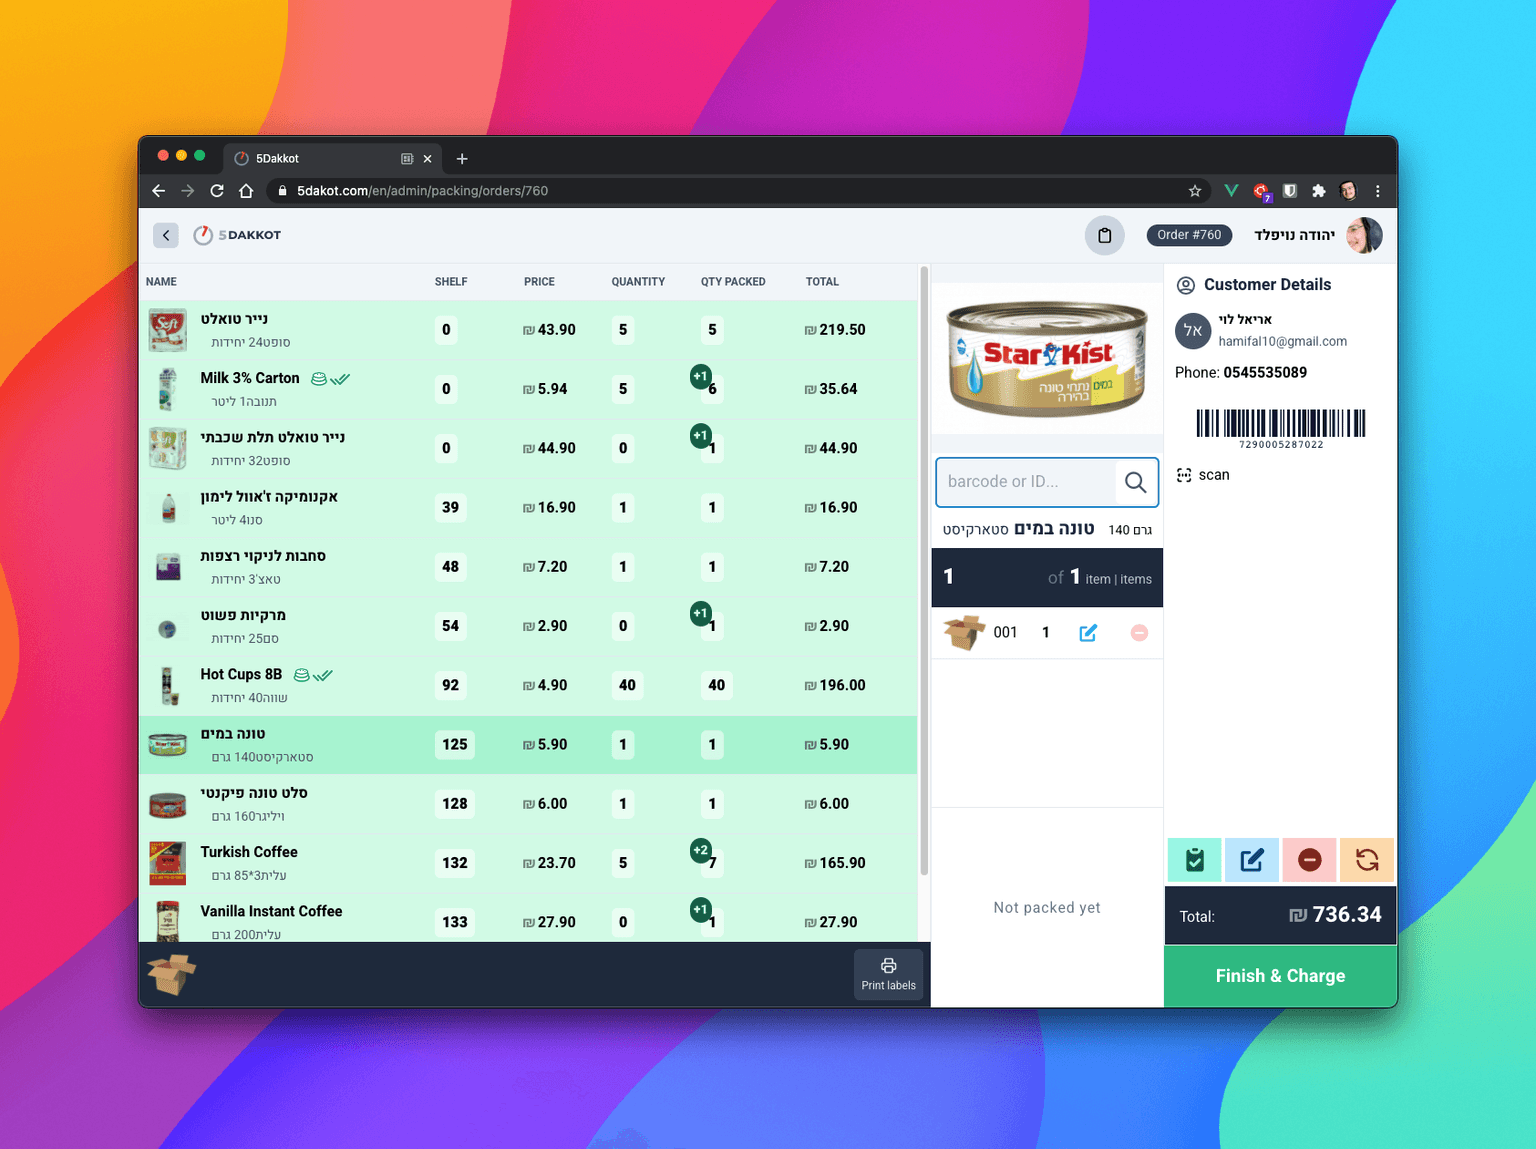
In one of the projects I'm working on (5Dakkot), we were building the order fulfilment software, that is supposed to work like this:
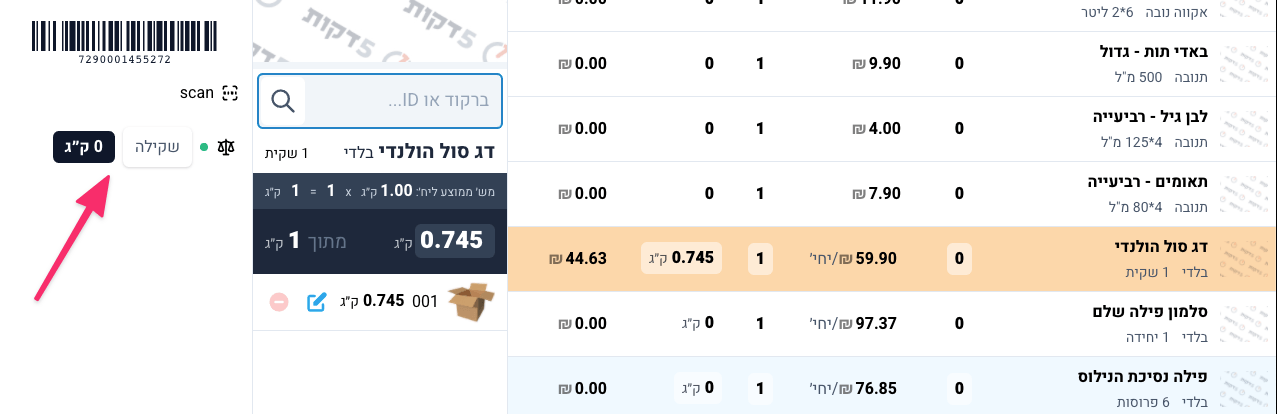
A packer opens up the order, and gets a list of the order items. He packs the items into boxes, scanning each item with a barcode scanner. For weighable items (e.g. fruit and veg) he needs to weigh the item on a scale, and update how much he has packed, so we can charge the customer the right amount.
We wanted the scale to automatically send the weight to the application, so the packer shouldn't need to manually enter the weight, which speeds up the process and reduces human error.
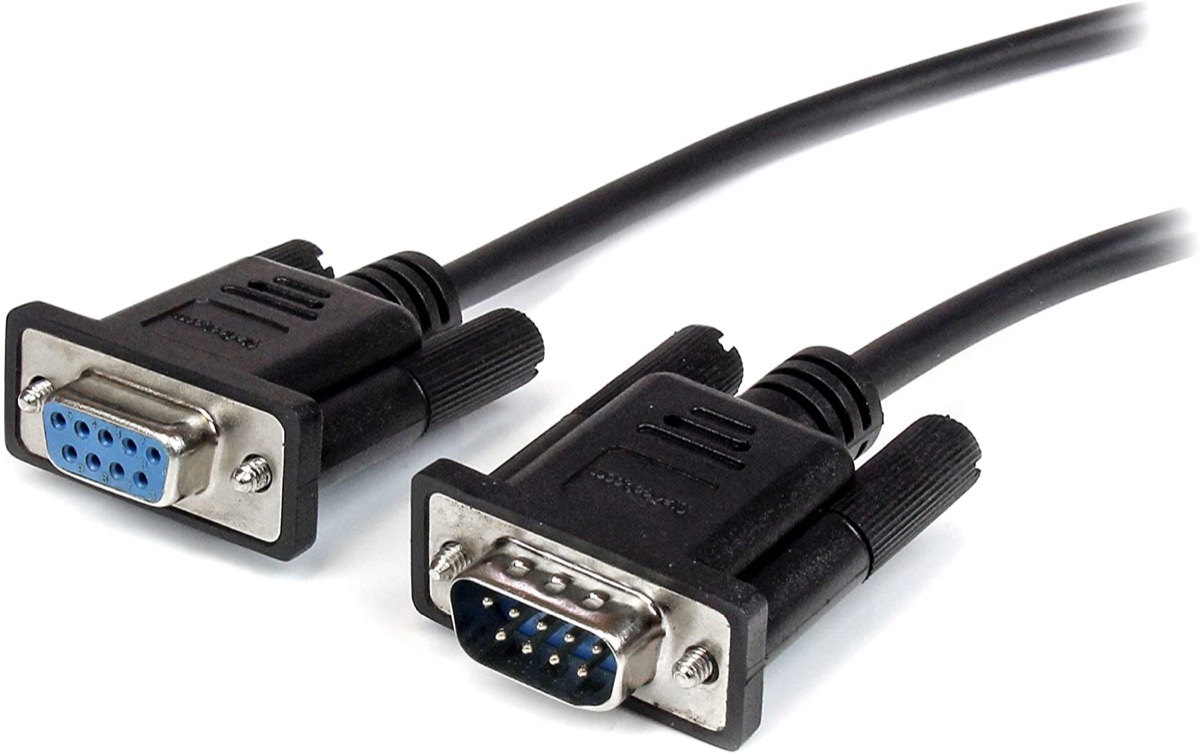
The problem was that the scale only connects with an RS232 port, which then needs special software that the scale company wanted an outragous amount of money for...
So can we communicate with these hardware devices from the web?
Luckily, although still experimental and only available in Chrome (& Chromium Edge) fairly recently (since Chrome 89), the answer is yes: with the Web Serial API.
What is the Web Serial API?
A serial port is a bidirectional communication interface that allows sending and receiving data byte by byte.
The Web Serial API provides a way for websites to read from and write to a serial device with JavaScript. Serial devices are connected either through a serial port on the user's system or through removable USB and Bluetooth devices that emulate a serial port.
In other words, the Web Serial API bridges the web and the physical world by allowing websites to communicate with serial devices, such as microcontrollers and 3D printers.
In short, it's a browser API aimed to give web applications the ability to communicate directly with hardware devices.
Getting Started
The web serial API lives on the global navigator.serial object. You can check that the browser supports it like so:
if (!'serial' in navigator) { // The Web Serial API is not supported. alert('Please update to the latest Chrome')}Opening a Port
The first step is to open a serial port:
const port = await navigator.serial.requestPort()As you can see, we're using await, as the Web Serial API is asynchronous by design, so the application doesn't freeze when awaiting responses from the device.
This command will open a list of available ports, for the user to choose the one to connect to.
Once the user has granted access to a port, it will be available for future use like so:
// Get all serial ports the user has previously granted the website access to.const ports = await navigator.serial.getPorts()Once you have a reference to the port, you can open it:
// Wait for the serial port to open.await port.open({ baudRate: 9600 })The baudRate specifies how fast data is sent over a serial line. It is expressed in units of bits-per-second (bps). Check your device's documentation for the correct value as all the data you send and receive will be gibberish if this is specified incorrectly.
Reading from the Port
Input and output streams in the Web Serial API are handled by the Streams API.
Once the serial port connection is open, the SerialPort instance will have a readable property, which will return a ReadableStream, which can be used to receive data from the serial device. The data is transfered in the shape of Uint8Arrays.
A Uint8Array is just an array of 8 integers, representing 8 bytes of data.
When new data arrives from the serial device, port.readable.getReader().read() returns two properties asynchronously: the value and a done boolean. If done is true, the serial port has been closed or there is no more data coming in. Calling port.readable.getReader() creates a reader and locks readable to it. While readable is locked, the serial port can't be closed.
const reader = port.readable.getReader()// Listen to data coming from the serial device.while (true) { const { value, done } = await reader.read() if (done) { // Allow the serial port to be closed later. reader.releaseLock() break } // value is a Uint8Array. console.log(value)}Now we're already reading the bytes sent by the device, but it's in a low-level byte format. To read the text we need to convert the data to a readable format.
Decoding the Data
As the data is streamed in, we need to use a TextDecoderStream (instead of a TextDecoder) to pipe the incoming ReadableStream through the TextDecoderStream. The TextDecoderStream will grab all Uint8Array chunks and convert them into UTF-8 encoded strings.
We'll modify the first 3 lines:
const textDecoder = new TextDecoderStream()const readableStreamClosed = port.readable.pipeTo(textDecoder.writable)const reader = textDecoder.readable.getReader()// Listen to data coming from the serial device.while (true) { const { value, done } = await reader.read() if (done) { // Allow the serial port to be closed later. reader.releaseLock() break } // value is now a string. console.log(value)}Now instead of reading directly from the port's reader, we pipe the port's readable through the textDecoder's writable, then we read the textDecoder's readable to get the decoded data.
Writing to the Port
To get the weight from the scale, we need to send it a 'w', this triggers the scale to weigh the item & send back the weight.
To write to the port, pass data to port.writable.getWriter().write(). The data needs to be in Uint8Array format, but we can use a TextEncoderStream to convert strings into bytes:
const textEncoder = new TextEncoderStream()const writableStreamClosed = textEncoder.readable.pipeTo(port.writable)const writer = textEncoder.writable.getWriter()await writer.write('w')Now we can send a 'w', and expect to get the weight back from the scale!
Result
Now the packer can press a button to get the weight from the scale sent directly to the application!